Tuesday, December 20, 2016

Book Pocket Pillow


 I made this book pocket pillow for my niece. I got the tutorial from Melissa Mortenson at The Polka Dot Chair blog. She makes a lot of beautiful sewing patterns.


The polar bear is a Follow the White Bunny embroidery pattern by Nicole Vos van Avezathe. Here is her Etsy Shop. She is ridiculously talented.


I added some top stitching on the back pieces.


The pattern said to put the handle three inches from the outside edges
 but I think it was supposed to be three inches from the center. 


I added top stitching on the front pocket as well.


The pillow is 18" and the pattern said to cut the fabric at 18" as well, so I was a little nervous that it would be too small after adding a seam allowance. But I followed the instructions and it turned out perfectly. I love it.


Saturday, October 29, 2016

Globe Centerpieces

I have some close friends who run a non-profit that does mission trips around the world, and I agreed to help them decorate tables for their first fundraising dinner. I had seen an inspiration photo on Pinterest where someone had painted gold continents on blue globes, so I copied this look and I am really happy with how it turned out.
Each table had a flag from one of the places they had done a mission trip, so we glued floral foam to the inside of the globe to anchor the flags.
We used the centerpieces the next day at an international dinner we had at our church.
Here is a screenshot of the inspiration picture. I would love to give credit to the person who came up with this idea, but the Pinterest pin is just an uploaded photo and I can't figure out where it came from. If you know, please comment and send me the information so I can give credit where credit is due.

Here are the globes taking over my kitchen. FYI, this project took a little more time than I thought it would. But it was totally worth it.

I couldn't find the little reed balls in stores, so I made them myself out of yarn and twine.


I didn't take photos of me making the paper globes, but I basically traced continents onto the globes in gold sharpie (don't use the super-thin gold sharpie. It didn't work at all. I used one of the thicker pens), and then I filled in with gold paint. I got the continents from this Scholastic post. If the continents aren't the right size for the globes, use a copier to adjust the size. I added about 25%.

We bought these 10" lanterns from Amazon that cost about $10 for 10.  We accidentally bought too many but that turned out to be a good thing because I messed up a few and needed more. In the inspiration pic, it looks like the globe is sitting in a dish, but that was out of my budget, so I just carefully bent the prongs of the wire frame so it would sit flat.

We bought a pack of beveled mirror squares from Amazon, similar to these. We paid about $20-25 for them.  Candles didn't work to light the globes, so we bought these LED lights for about $11 and put three in each globe. It is also much safer than the other lighting options.


I was surprised about how much I loved this twine ball craft. I got the instructions from the blog Key to Flow. I love how cheap it is and you can use them for events, for your home or decorating for holidays.  This recipe uses paper mache paste made from flour, sugar and water. I tried the glue recipe I found on Pinterest but it didn't work as well, it was messier, and it was more expensive because I ran out of the paste really fast.

You basically wipe Vaseline on balloons, run yarn or twine through the paper mache paste, wrap it around the balloon and hang to dry. I used ornament hangars to hang them.

The twine worked really well, but the yarn took longer to dry and wasn't as hard as the twine. But they both worked. 

Here are a couple in my kitchen.  I think for Christmas I am going to hang some on a string of LED lights.


The following week, a friend and I threw a baby shower so we decided to re-use and do a Welcome to the World theme. We hung the globes and put them on the dining table, and my talented friend cut up some old maps and used real globes and old suitcases as well. 

One really annoying thing about me is that I always forget to take photos of the things I create at the actual event. So there are no good photos of the paper globes I put on the tables at the shower. 


These are clipboards with maps and letters hung on the windows. 


We played a pacifier chopsticks game we got from this website. We had a relay race with two groups. The players held a chopstick in their mouth, ran to pick up a pacifier with the chopstick and then passed it down the line. It was a lot of fun. We also played an Around the World matching game from Pinterest, where you match the word "baby" in different languages.


Wednesday, September 14, 2016

Belt Bracelet


Today I made a bracelet from an old leather belt and "be brave" stamped on metal. I really love how it turned out. 

I learned how on Christy Tomlinson's online Belt Bracelet workshop (here is the link to her workshop).

Look how cool her bracelets are! Check it out.


Tuesday, June 14, 2016

Buzzfeed Feature


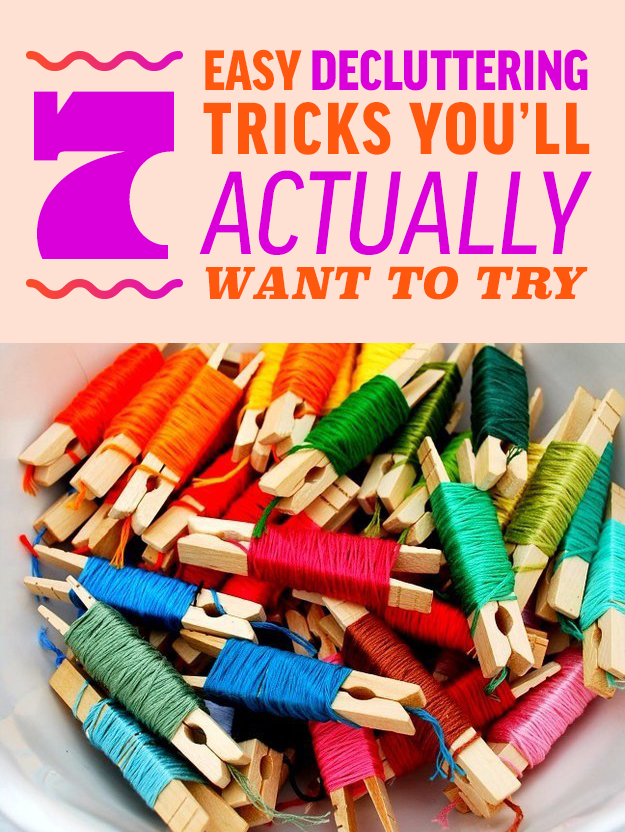
One of my more popular posts, about how to organize embroidery floss, was featured on Buzzfeed. How exciting is that?! Check out Buzzfeed for more decluttering tips.

Thursday, June 9, 2016

House Remodel Sneak Peak

We had a flood in our house last winter and we decided to take the opportunity to replace the floors on the entire main level of our house AND put in a completely new kitchen. Oh, and we are doing most of the work ourselves. We did hire someone to do the tile, and that is going in this week. I will post more photos later, but here is a before and after sneak peek.


Wednesday, June 8, 2016

Cupcake Purse

I made this cupcake purse for my niece. It was really easy and it turned out cute.
I picked up the pattern at a local quilt shop a long time ago, but you can get it here.

Friday, March 4, 2016

Zippered Pouches


I saw the open wide zippered pouch tutorial on Anna Graham's blog, Noodlehead, and I finally made some of these cute bags for my daughter this week. It was a pretty easy pattern to follow, and I think they turned out great!

I used a Cotton & Steele Paper Bandana print by Alexia Marcelle Abegg (bottom), what I believe is an Art Gallery Fabrics denim (middle), and Robert Kaufman Flame by Carolyn Friedlander (top).

I dug through my craft room and found some suede cord to tie onto the zipper.
 I mixed up the fabric, and next time I might try to do some piecing on the outside.

 I love the small one the most. I am going to make one for myself today.
 I bought her book while I was at it. I think I might try the fabric bracelets project next.


Sunday, February 28, 2016

Tissue Holders - Group Gift

I recently took a Women's Empowerment class with some of the ladies from my church, and some new friends as well. It was great to be with a group of encouraging and positive like-minded people. When the class was over, I made a little gift for everyone.
I made tissue holders from the tutorial at Notes from the Patch.  They are nice because the little packs of tissues for your purse pop right in and they look better than a plastic bag. Here is the link to when I made them the first time. I have also made this as a teacher thank you gift, too.

I put each one in a paper lunch sack, folded the sack closed and zig-zag stitched across the top. I also stitched across a little scrap of fabric and then tied the fabric. It's my favorite way to wrap gifts.

Wednesday, January 27, 2016

Wine Tote

I have been wanting to try making some wine totes to use as gifts or to sell for some extra spending cash. Well, I finally got around to it.


I bought this pattern from Pattern Play Designs at Craftsy which was really easy to use.  For my trial run, I used some scrap fabric and painter's drop cloth. Because the drop cloth was heavy fabric, I did not use the batting called for in the pattern.  After I cut out the pieces, I printed a graphic from The Graphics Fairy, held it up to the window and traced it onto the drop cloth fabric with a sharpie pen. Then I sewed the bag together. 


 I am really excited about how well it turned out.


Linking to: 


Related Posts Plugin for WordPress, Blogger...